Bleeding the brakes on your dirt bike is a routine part of maintenance. It may sound intimidating especially to the non-mechanic but bleeding your dirt bike brakes is actually a fairly simple process and should be done regularly not only for safety but to ensure proper maintenance of such a delicate part of your machine.
Brake fluid deteriorates over time by absorbing moisture and air. This ultimately affects your bike's ability to stop. You'll know the brake fluid on your dirt bike needs changing when braking feels "spongy" rather than giving a direct, responsive stop.
You'll need the following tools to change the brake fluid in your dirt bike:
- DOT 4 brake fluid (double check on brake reservoir cap)
- Wrench - open ended
- Drip pan
- Screwdriver or torx driver
Locate the brake fluid reservoir (mounted on the handlebars) and remove the filler cap. (Need a replacement cap?) Ensure that the area around the cap is free of dirt and debris. The last thing you want is dust, dirt and debris clogging up your lines.
Brake Reservoir Mounted on Handlebars
Top off the reservoir.
Top off slowly - no bubbles!
Next locate the drainage nipple (or nut) on the backend of the brake caliper. Remove the rubber cap. Place your drip pan underneath the brake caliper to catch the old brake fluid. Pump the brake lever two or three times and slowly loosen the nipple with the wrench while keeping pressure on the brake lever.
Arrow is pointing to drainage nipple
You'll see the old fluid drain out and feel the pressure on the brake lever soften. Tighten the drainage nipple then let go of the lever - be sure to tighten the nipple first before letting off pressure on the brake lever. Top off the brake fluid again and repeat the process of pumping the brake lever, loosening the nipple and draining out the fluid until you see new brake fluid seep through.
Remember! Be sure you constantly top off the brake fluid during the bleeding process so you don't get air into the lines. You'll know if you get air in the brake lines because your brakes won't feel any different than before you bled them. If this happens the process is a bit more complicated and you're better off talking to a professional mechanic. The other option is to repeat the brake bleed process much more extensively than the first time and see if you can push the air out.
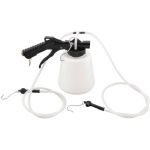
There are additional tools available to ensure air does not get into the brake lines. Bleeding kits incorporate a tubing system to bleeding your brakes and prevent air from getting into the lines.
|
Good Brake Bleeder Kit |
Better Brake Bleeder Kit |
Best Brake Bleeder Kit |
|---|---|---|
 |
 |
BikeMaster Vacuum Brake Fluid Bleeder  |
|
Price: $17.99 |
Price: $26.99 |
Price: $35.96 |
Features:
|
Features:
|
Features:
|
Once you see new brake fluid draining out and feel good brake pressure at the lever, tighten the nipple and top off the reservoir to three-quarters full by using the small window on the reservoir as a guide. Replace and tighten the reservoir cap. Now you know how to bleed the brakes on your dirt bike. Follow the same process for your rear brakes. Be sure to test your brakes prior to riding simply by rolling the bike and hitting the brakes.


