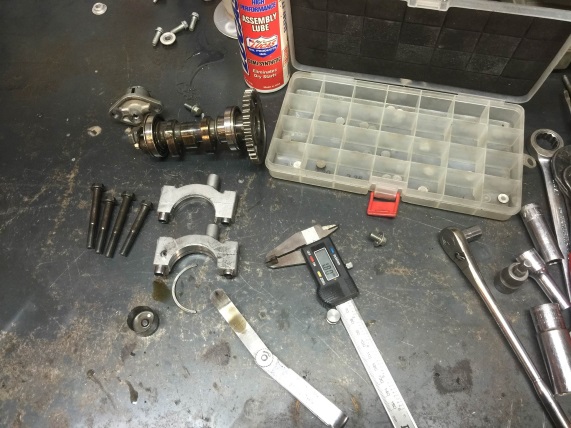
Always check your valve for clearance. Always.
Cheap insurance against a total and complete engine failure.
Of course the process doesn't take a mere 10 minutes using eyeball sight which explains why sometimes this routine maintenance gets neglected. But checking also doesn't mean setting aside an hour after every ride. Read your owner's manual for the recommended service intervals and for sure inspect while doing a top end because you might as well since you got the cylinder head cover removed. See that's called Preventive Maintenance.
What's so important about the valves and clearance?
Intake and exhaust valves on a 4-stroke rest closed or sealed in the head on the compression stroke of the engine. The lash (remember this word) makes up the gap or clearance between the closed duration of the cam lobe and the tappet or rocker arm. If this lash clearance doesn't fall within manufacturer's specification you get operation issues.
Buckets and rockers
No gap (valves too light) causes the valves to hang open slightly creating no compression on the compression stroke. Too large a gap prevents the valves from opening all the way preventing the necessary fuel/air into the cylinder (intake) or the exhaust/burnt fuel and air out of the cylinder (exhaust). This results in lean or rich situations, compression issues, hard starts or not starts and a host of other problems.
To measure valve clearance, first remove the cylinder head cover (even if not performing a top end) and ensure a clean surrounding area so dirt doesn't fall into the engine as you remove parts. Now, you need a set of feeler gauges along with the appropriate specs from your manual and a cold engine. Don't check after riding as heat causes things to expand and you will not get an accurate reading. Valve clearance numbers look like this:
- IN (intake): 0.005 +/- 0.001 in (0.12 +/- 0.03 mm)
- EX (exhaust): 0.011 +/- 0.001 in (0.28 +/- 0.03 mm)
The feeler gauge looks like this:
Checking Valve Clearance
Before taking your measurements you need to align the engine to top center by rotating the crankshaft because clearance inspection requires the piston at the top of the compression stroke with the intake and exhaust valves closed. Some makes and models feature what look looks a punch mark on the primary drive gear that aligns with an index mark on the right crankcase cover as a guide. For simplicity though just line up the timing marks and refer to the manual for what to line up. When rotating the crankshaft, rotate clockwise, don't go backwards or counterclockwise.
Now, get your owner's manual for specific photos to the make and model of your dirt bike unless you already know the ins and outs of the engine. Lots of parts in there. This guide provides a general overview and hopefully fills in some gaps left by the owner's manual but does not constitute a step-by-step guide so having some knowledge of engine parts and components really helps. Otherwise, grab a friend who has done this before or who can point out what is what.
Measuring shims and adjusting valves
To measure the intake, insert the largest specified feeler gauge blade in the gap between the shim bucket and the cam. The blade should fit and offer some drag or a bit of resistance. If the blade doesn't fit work your way downwards in blade size (one reason feeler gauges come as a set comprising of many blades) until you find the one that fits. The one that fits should indicate the specified valve clearance range as noted above (but specific to your make and model dirt bike). Conversely, work your way up the blades if you find too large a space.
If the final blade used shows too tight or too loose (i.e. too much lash) you need to make some adjustments. Lash gets smaller as it wears and the valves stretch while wear on the cam, bucket, shim or rocker increases the lash.
To measure the exhaust, insert the feeler gauge between the exhaust rocker arm and shim and follow the same procedure as above using the noted guidelines (again using the specs specific to the make and model of your dirt bike).
Mechanic's Note: Not all bikes have rockers on the exhaust side. Some are cam on bucket on all valves. Some that have rockers don't use shims they adjust with a set screw tappet.
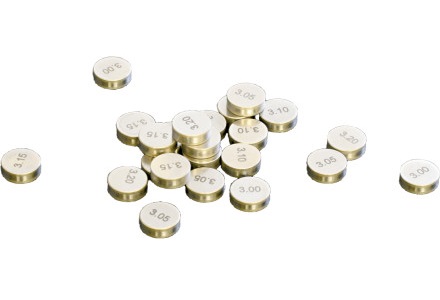
To make adjustment remove the cam and change the thickness of the shim under the bucket. If too large a space add the correct size shim to gain the appropriate valve clearance and if too small remove and replace the current shim with a smaller one. Shims look like foreign currency and come in different sizes:
Installing Shims
Shims actually just sit on top of the valve in a recessed retainer on top of the spring and two cotters that hold the spring to the valve. You never stack shims or add more than one. The bucket sits on top of the spring holding the shim in place. Your bike might feature a rocker arm that holds the shim in place while sitting loosely on the valve.
If you notice the valves warped or not seating properly you can forego the shims and riding because you need to replace the valves at this point. Keep riding and expect a blown engine along with a more expensive and extensive repair.


