


Dirt bike handlebars rank right up there next to the engine components as the most complex and intricate parts of the dirt bike. Sure, on the surface, handlebars simply represent the steering wheel of your bike that you use to dictate where you want to go.
Take a fresh look and you'll see the handlebars are ground control to just about everything that makes your dirt bike operate and ultimately gets you across the finish line.
Handlebars bring a unique design that separate them from any other part in light of the bends and the details in the shape. Before tackling the sections of the dirt bike handlebar it's best to understand the two styles of handlebar - the 7/8th-inch and the 1-1/8th -inch handlebar.
The 7/8th-inch handlebar used to be the industry standard. The size characteristic comes from the diameter of the "Clamp" section (see below) of the handlebar. For years, the 7/8-inch bar ruled the tracks until a small company came along and offered a different perspective.
The 1 1/8th-inch Dirt Bike Handlebar
In 1991, Pro Taper introduced the 1-1/8th Taperwall handlebar and revolutionized the motocross industry. So, instead of a 7/8th inch diameter in the Clamp area, Pro Taper increased that size to 1-1/8th inch. Since then many handlebar manufacturers adopted the 1-1/8th and it is now routinely used in Motocross and Supercross. It comes down to rider preference on which handlebar to use.
The 7/8th- and 1-1/8th-inch Difference
The difference between the two bars is quite simply strength. If you ride hard or heavily compete on the track you're probably better off with a stronger handlebar. Cracking your bar in half after landing a bad triple is not only defeating but dangerous. The 1-1/8th-inch bar tends to reduce fatigue and arm pump.
Dirt Bike Handlebar Dimensions

Height
A handlebar's height is the measurement from the clamp area to the top of the control length (or end of the handle part of the bar). The height of the handlebar can be adjusted by loosening the bar at the clamp area and adjusting forward or backward to your preference.
Rise
The rise is similar to the height in that it measures the length from the clamp area to the handlebar's first steep bend. To lengthen the rise you can use riser clamps to maximize the handlebar's overall height. The taller you are the more likely you'll want to raise the height of your handlebars.
Width
The dirt bike handlebar width is measured from one end to the other or the end of the left control length to the end of the right control length. Generally, most handlebars are constructed within a few millimeters of one another if not the same width altogether - about 800mm. Some manufactures make "mini" handlebars which reduces the width of the handlebars by as much as 60mm.
Sweep
The sweep is best viewed by looking at the side of your bike. Also known as the "pullback" it is measured from the center of the clamp area to the end of the bars (control length) in a letter "L" shape.
Control Length
The control length is the area for your grips.
Clamp Area
The clamp area is the bottom of the handlebars where it clamps onto the bike. The clamp area is where you can add risers and other equipment to change the measurements and feel of your handlebars. The thickness of the clamp area is 7/8th- or 1-1/8th -inch.
The Flexx Handlebar manufactured by the Fasst Company is a higher-end bar using advanced technology to absorb shock and vibration. The Flexx uses a rubber interference absorbing much of the vibration to your arms. This further reduces fatigue and arm pump providing a longer ride more comfortable ride.
If you're a weekend warrior on a budget spending the extra cash on a larger bar doesn't necessarily make sense. The 7/8th handlebar retains its popularity and is lighter than its larger counterpart.
However, as we said earlier - handlebar preference is entirely up to you. Check out our entire stock of dirt bike handlebars but we'd like to suggest the following if you're looking for a replacement or upgrade to your current ride.
 |
 |
 |
Features:
|
Features:
|
Features:
|
Twinwall Handlebars
We'd be remiss if we did not mention the Twinwall handlebar. This bar takes strength to a new level by incorporating a 7/8th- bar inside of a 1 1/8th-inch handlebar. For riders who have a history of breaking their handlebars this may be your answer as it is the strongest handlebar money can buy.
|
Twinwall Handlebar |
|---|
|
Renthal Twinwall Handlebars - Oversized 1-1/8"  |
Features:
|
Dirt Bike Handlebar Controls
Now that you understand all the bends and the different sections of the dirt bike handlebar we can now get into just how the handlebars act as the foundation to nearly every function of the dirt bike.
Check out this diagram and you'll see nearly everything required to manage, control and operate your bike originating from the handlebars.

Throttle
The right hand grip functions two-fold: a grip and the gas. Rolling the grip forward powers the bike and rolling it back cuts the fuel to the engine off. The throttle is to your dirt bike like a gas pedal is to a car.
|
Good Throttle |
Better Throttle |
Best Throttle |
|---|---|---|
|
Motion Pro Nylon Throttle Tube  |
Hammerhead Aluminum Throttle Tube  |
Motion Pro Revolver Throttle Kit  |
|
|
|
|
Features:
|
Features:
|
Features:
|
Hot Start Lever
The hot start lever becomes your best friend in the event of a stall especially when you're in the middle of a race. Use the hot start button in conjunction with kickstarting to immediately start your engine if you stall or crash. This saves a lot of time when trying to only kickstart your bike back to life. (Only 4-stroke bikes use hot start levers!)
|
Good Hot Start Lever |
Better Hot Start Lever |
Best Hot Start Lever |
|---|---|---|
|
ARC Rotator Clamp With Hotstart  |
Turner Performance Products Hot Start Kit  |
Works Connection Elite Perch Body Assembly With Hotstart  |
|
|
|
|
Features:
|
Features:
|
Features:
|
Kill Switch
The kill switch instantly shuts off gas to the engine thereby shutting the motor off. If you crash and get trapped under your bike the kill switch becomes more important to you then finishing the race. Most riders use OEM kill switches because aftermarket versions either require retrofitting or simply don't work with some bike models.
|
Good Kill Switch |
Better Kill Switch |
Best Kill Switch |
|---|---|---|
|
BikeMaster Replacement Kill Switch  |
Ride Engineering Billet Kill Switch LED Light  |
 |
Features:
|
Features:
|
Features:
|
Clutch Lever
The clutch lever is on the left side of the handlebars and is not to be confused with the front brake lever which is on the right side. It looks like a brake lever and if you ride mountain bikes and never ridden a dirt bike you might think it is a brake lever. The clutch lever releases the transmission into a neutral state so that you can use the shifter to change gears like a clutch pedal in a car.
|
Good Clutch Lever |
Better Clutch Lever |
Best Clutch Lever |
|---|---|---|
|
Turner Adjust On The Fly Clutch Lever & Perch With Hot Start  |
Streamline Reflex Pro Universal Clutch Perch  |
Magura USA Hydraulic Clutch 167  |
|
|
||
Features:
|
Features:
|
Features:
|
Front Brake Lever
The front brake lever is on the right side of the handlebars and is not to be confused with....OK, just see the above on the clutch lever! You'll notice there is no rear brake lever as that functionality rests with your feet. The front brake lever is, quite appropriately, placed by the throttle.
|
Good Front Brake Lever |
Better Front Brake Lever |
Best Front Brake Lever |
|---|---|---|
|
Pro Circuit Forged Brake Lever  |
 |
 |
|
|
||
Features:
|
Features:
|
Features:
|
Front Brake Master Cylinder
Where else would this go? You don't need to bother with the front brake master cylinder except during routine maintenance when you add brake fluid or bleed the brakes. However, it's always best to keep an eye on that fluid level. If you see brake fluid dip below the halfway point on that little window located on the master cylinder you better get to the shop quick before your brakes give out. Only OEM replacement parts available.
Throttle Housing
The throttle housing securely connects the throttle cable to the throttle tube which is connected to the throttle lever. If the cable disconnects from the throttle lever then you can't accelerate. Use OEM for replacement parts though the following is available packaged with the throttle tube.
|
Throttle Housing |
|---|
|
G2 Ergonomics Billet Pro Throttle Housing  |
Features:
|
All Those Cables
The cables of course transmit the message from your fingertips (e.g. squeezing the brake lever) to the part you want to operate (the front brakes). Wireless technology has yet to be invented so in the meantime the handlebars securely cradle all those cables to prevent tangling and so they stay out of your way.
Throttle Cable
|
Good Throttle Cable |
Best Throttle Cable |
|---|---|
 |
Motion Pro T3 Slidelight Throttle Cable  |
Features:
|
Features:
|
Clutch Cable
|
Good Clutch Cable |
Best Clutch Cable |
|---|---|
 |
 |
|
|
|
Features:
|
Features:
|
Hot Start Cable
|
Good Hot Start Cable |
Best Hot Start Cable |
|---|---|
 |
 |
|
|
|
Features:
|
Features:
|
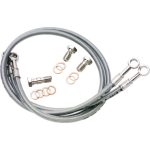
Front Brake Line
|
Good Front Brake Line |
Better Front Brake Line |
Best Front Brake Line |
|---|---|---|
|
Ride Engineering Front Brake Line - Black  |
Turner Performance Products Front Brake Line Kit  |
 |
|
|
||
Features:
|
Features:
|
Features:
|
Check out the following video on dirt bike controls
